Since my very first serious days with photography, I've been interested in tilt&shift lenses. To be more precise, my interest was about shift lenses, because I hated those bad perspectives in architectural shots and at the time the post-processing workflow was painfully slow, with Photoshop. A few years later, perspective correction in Lightroom did the trick and I was happy with it (yes, a shift lens is always better because you get it right with glass only and don't have to throw away a bunch of megapixels, which is unavoidable with post-processing, but I can live with that). There was a remaining curiosity about tilt lenses and their capability of placing the focusing plane, but I was not sure that the resulting images are of a kind that I like. Trying is always the best thing to do: after all I wasn't convinced about the Trioplan in the beginning, while now I love it. Unfortunately tilt&shift lenses were and still are really expensive. Recently Samyang introduced a model at a very reasonable prices, but in the past two years I spent quite a few money to replace my old Nikon equipment with the Sony mirrorless gear: so, at the moment, every buy must be carefully evaluated.

Sony NEX-6 + Nikkor 50mm ƒ/1.8D AF @ 50 mm, 1/640 sec @ ƒ/4, +1.00 EV, ISO 100, hand-held, tilt adapter.
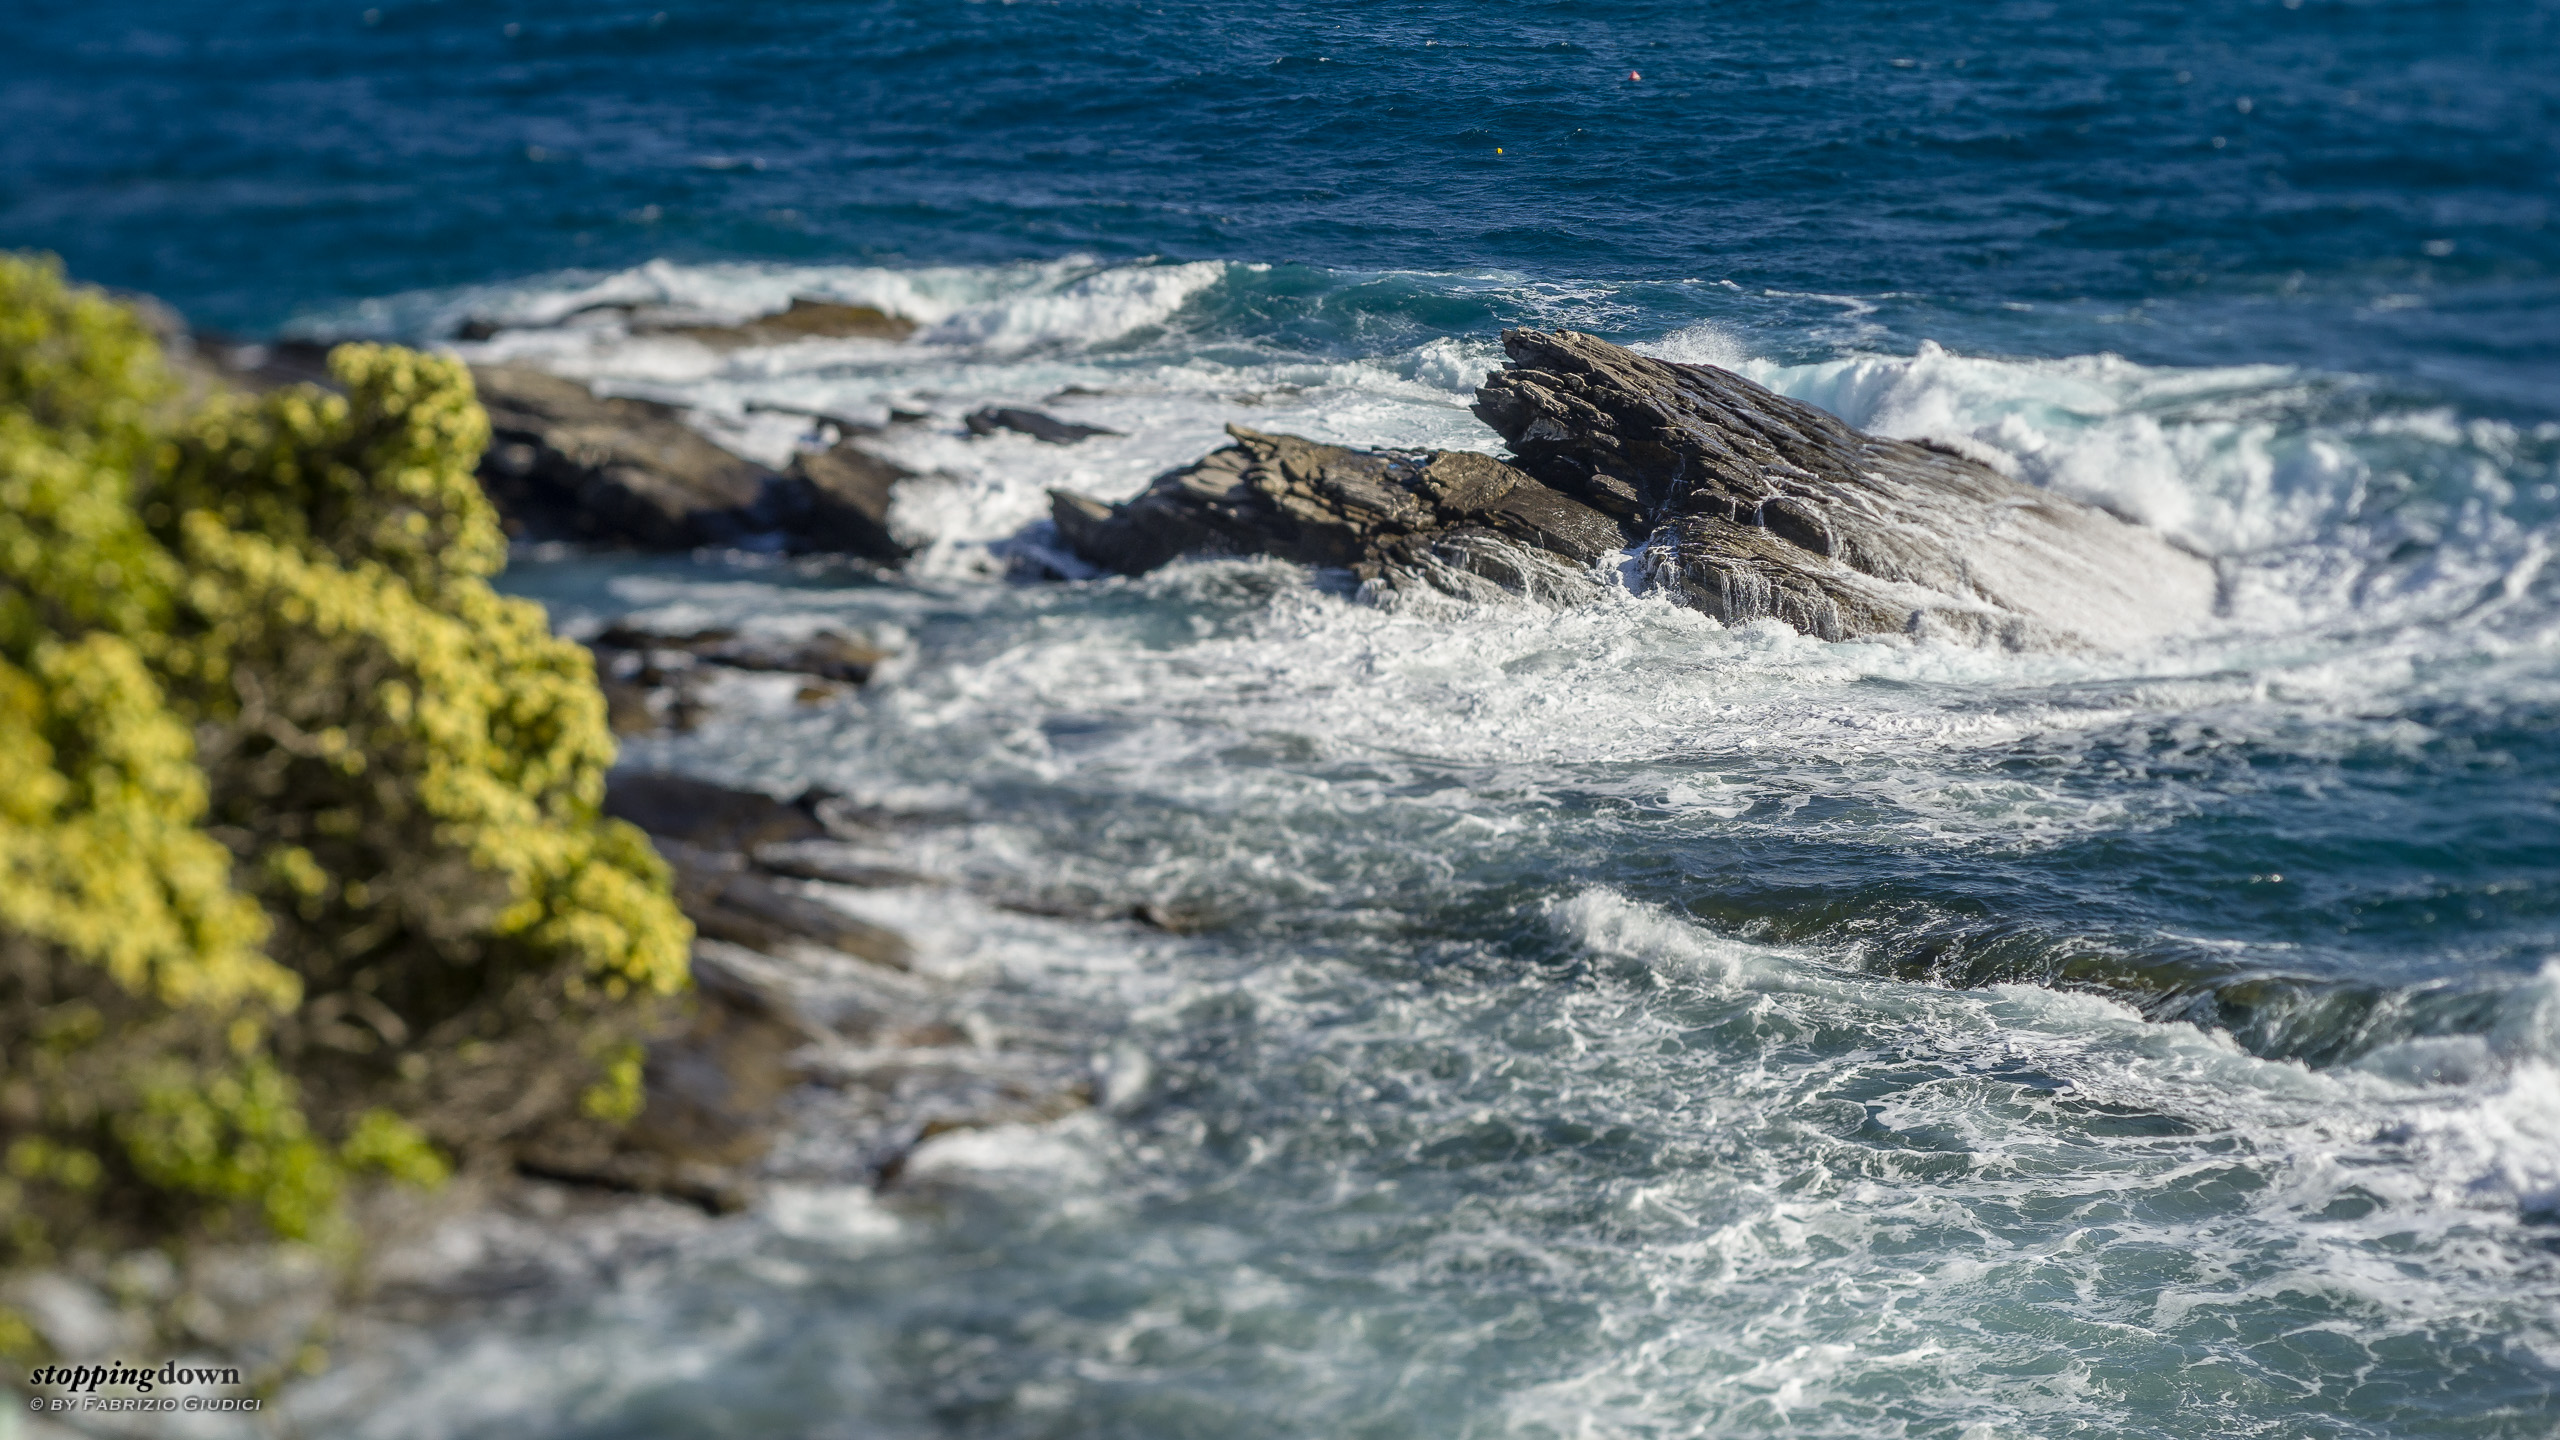
Scogli in mezzo alle onde.


Sony NEX-6 + Nikkor 50mm ƒ/1.8D AF @ 50 mm, 1/40 sec @ ƒ/2.8, +1.30 EV, ISO 200, hand-held, tilt adapter.
Le gole del Gorzente.
With the mirrorless systems a new range of opportunities appeared: the existence of tilt&shift legacy adapters makes it possible to reuse manual focus lenses giving them the capabilities I'm talking about. You don't get auto focus, stabilisation, but this happens with native tilt&shift lenses too. You don't get EXIF data, but this happens with the cheaper Samyang option too. Honestly, tilt&shift adapters aren't exactly cheap: you can find them on eBay for about 250/300€. Still expensive for something that I could later dislike. But I've also discovered a cheaper adapter, which is tilt-only and sells for just 50€. Interesting.
So I bought it. I don't understand which is the brand — I'm sure it's made in China — but it's well machined. When you mount it, the whole system feels solid, without excessive play. A ring makes it possible to adjust eight positions of tilting, the maximum one being at 8 degrees: which is exactly what native tilt lenses offer. The whole mount can be rotated on its axis, so you can orient the tilt direction anywhere you like.

Sony NEX-6 + Nikkor 50mm ƒ/1.8D AF @ 50 mm, 1/4000 sec @ ƒ/1.8, ISO 100, hand-held, tilt adapter.
Focusing exercise. The only focused part is the faraway group of rocks.
Sony NEX-6 + Nikkor 50mm ƒ/1.8D AF @ 50 mm, 1/4000 sec @ ƒ/1.8, +1.00 EV, ISO 100, hand-held, tilt adapter.
Focusing exercise. The only focused part is the horizontal row containing the single rock in the bottom right third.
The theory of photography with tilting lenses is based on the Scheimpflug principle which is explained at Wikipedia in its mathematic foundation; but I really suggest this tutorial which is based on a practical approach and includes a number of examples images and diagrams. The basic concept is that you have some freedom in placing the focal plane so it's no more parallel to the sensor. With the proper placement, the result is an extremely shallow DoF, that can be precisely put on the subject. This is frequently used to have landscape images with a "miniature effect" (playing with the fact that our brain associates a shallow DoF with photos of small objects), even though I think that today most people achieve this effect with post-processing. I'm not really interested in the miniature effect itself, but the shallow DoF can help in throwing out of the viewer attention larger portions of unwanted stuff. I'm thinking, in particular, of macro photography.
In the photo below, I was able to “dissolve” a number of football players (with the exception of one) into out-of-focus balls, and bring the viewer's attention on the building of the XVI century; even though I made a mistake and the peak of the focus band is on the girl sat at the foot of the palm instead of the semi-open window that I was aiming at. The problem is that I shot hand held and I slightly moved the camera horizontally after focusing, so the focal plane drifted from the position in which I confirmed the focus. So the tripod is probably a must even though there is no requirement to avoid motion blur.
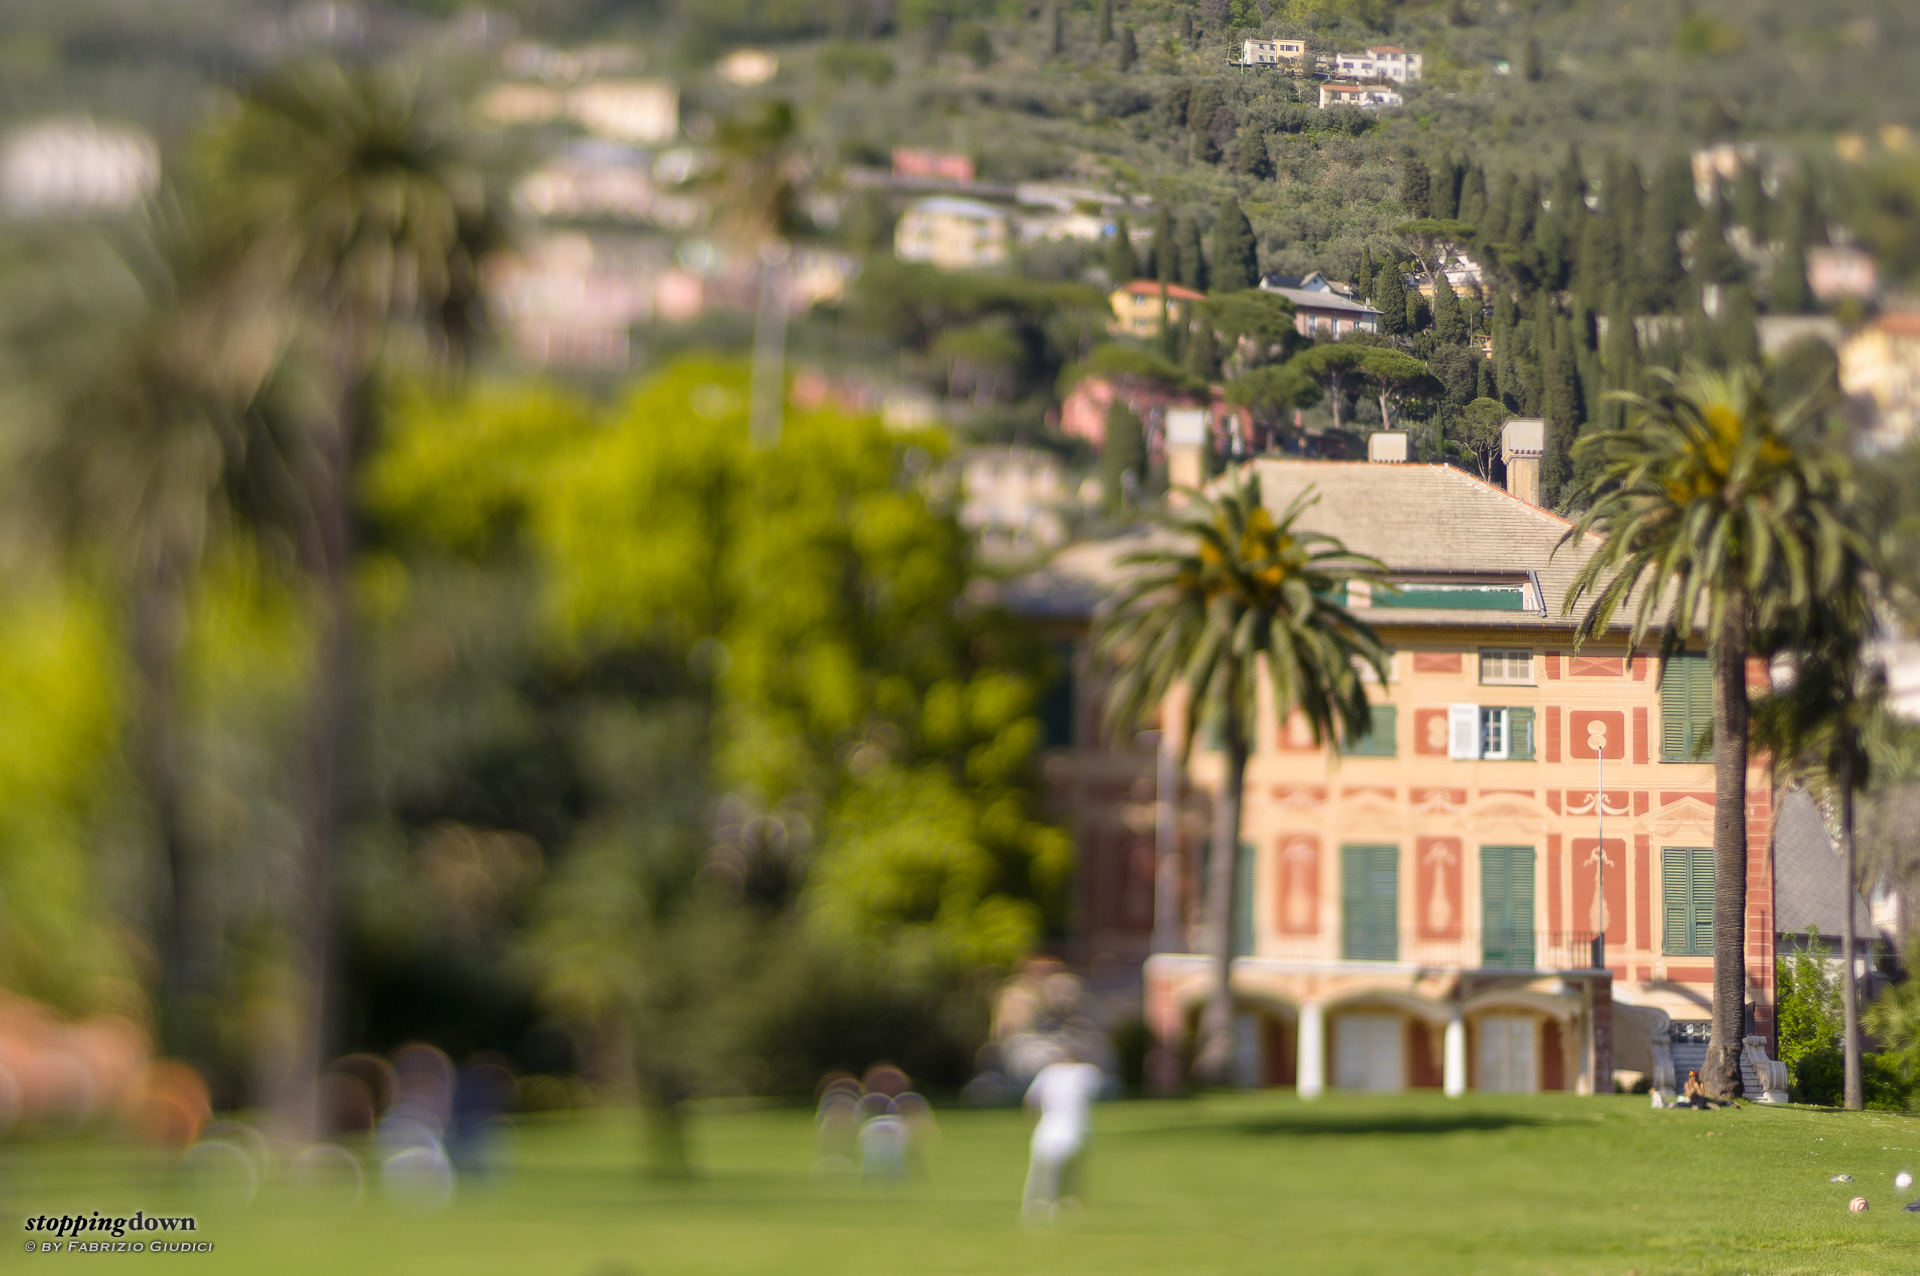

Sony NEX-6 + Nikkor 50mm ƒ/1.8D AF @ 50 mm, 1/1600 sec @ ƒ/1.8, +1.00 EV, ISO 100, hand-held, tilt adapter.
Villa Grimaldi Fassio.
The first attempts that you can see in this post have been made with my previous Nikkor 50mm ƒ/1.8D lens. Actually, I also own a 24mm ƒ/2.8 and an 85mm ƒ/1.8, that happen to be exactly the typical focal lengths of native tilt&shift lenses. So, before selling them, I'll give them a last opportunity to serve me.
I still don't have any idea of which focal can be the most useful to me — indeed, I have a number of more basic problems, since the capability of pre-visualise the final result of the photo is important, and the Scheimpflug effect is totally new to me. In my very first attempts I just shot at random, changing the tilt angle and trying to associate the final effect to each setting (I think this will be a somewhat lengthy process). It then has to be associated to the composition practice, so that the final result makes sense: honestly — apart from the fact that so far I practiced only with some boring stuff close to home — I'm not finding any aesthetic value if the photos I've taken so far (perhaps without a couple of exceptions). A few months of exercise will be needed.

Sony NEX-6 + Nikkor 50mm ƒ/1.8D AF @ 50 mm, 1/4000 sec @ ƒ/1.8, +1.00 EV, ISO 100, hand-held, tilt adapter.
Focusing exercise. The only focused part is the vertical column containing the door, from near to far distance.

Sony NEX-6 + Nikkor 50mm ƒ/1.8D AF @ 50 mm, 1/4000 sec @ ƒ/1.8, +0.70 EV, ISO 100, hand-held, tilt adapter.
Focusing exercise. The only focused part is the vertical column containing the single rock, from near to far distance.
While shifting would surely require that the lens is capable of creating an image much larger than the sensor (because a good portion of the image would fall off the sensor), I'm not sure whether it's a requirement also for tilting. In any case I'm fine, since my Nikkor legacy lenses are all designed for full-frame and my Sony bodies are APS-C. They are all of good/very good IQ (especially the 50mm and the 85mm), capable of being very sharp at the centre of the frame. But this doesn't imply that their IQ is totally preserved when they are tilted. For instance, in a few images of the sea landscape, high contrast areas were suffering from very noticeable colour fringing, not seen with the lens normally mounted. Anyway it could be decently corrected with Lightroom.
A subtler point is bokeh, which is even more important than usual, since now most parts of the image are blurred. The bokeh with the tilted 50mm doesn't excite me a lot, honestly. If at the end of my evaluation I'll be still interested in tilting I will search for some legacy lens with a better bokeh.
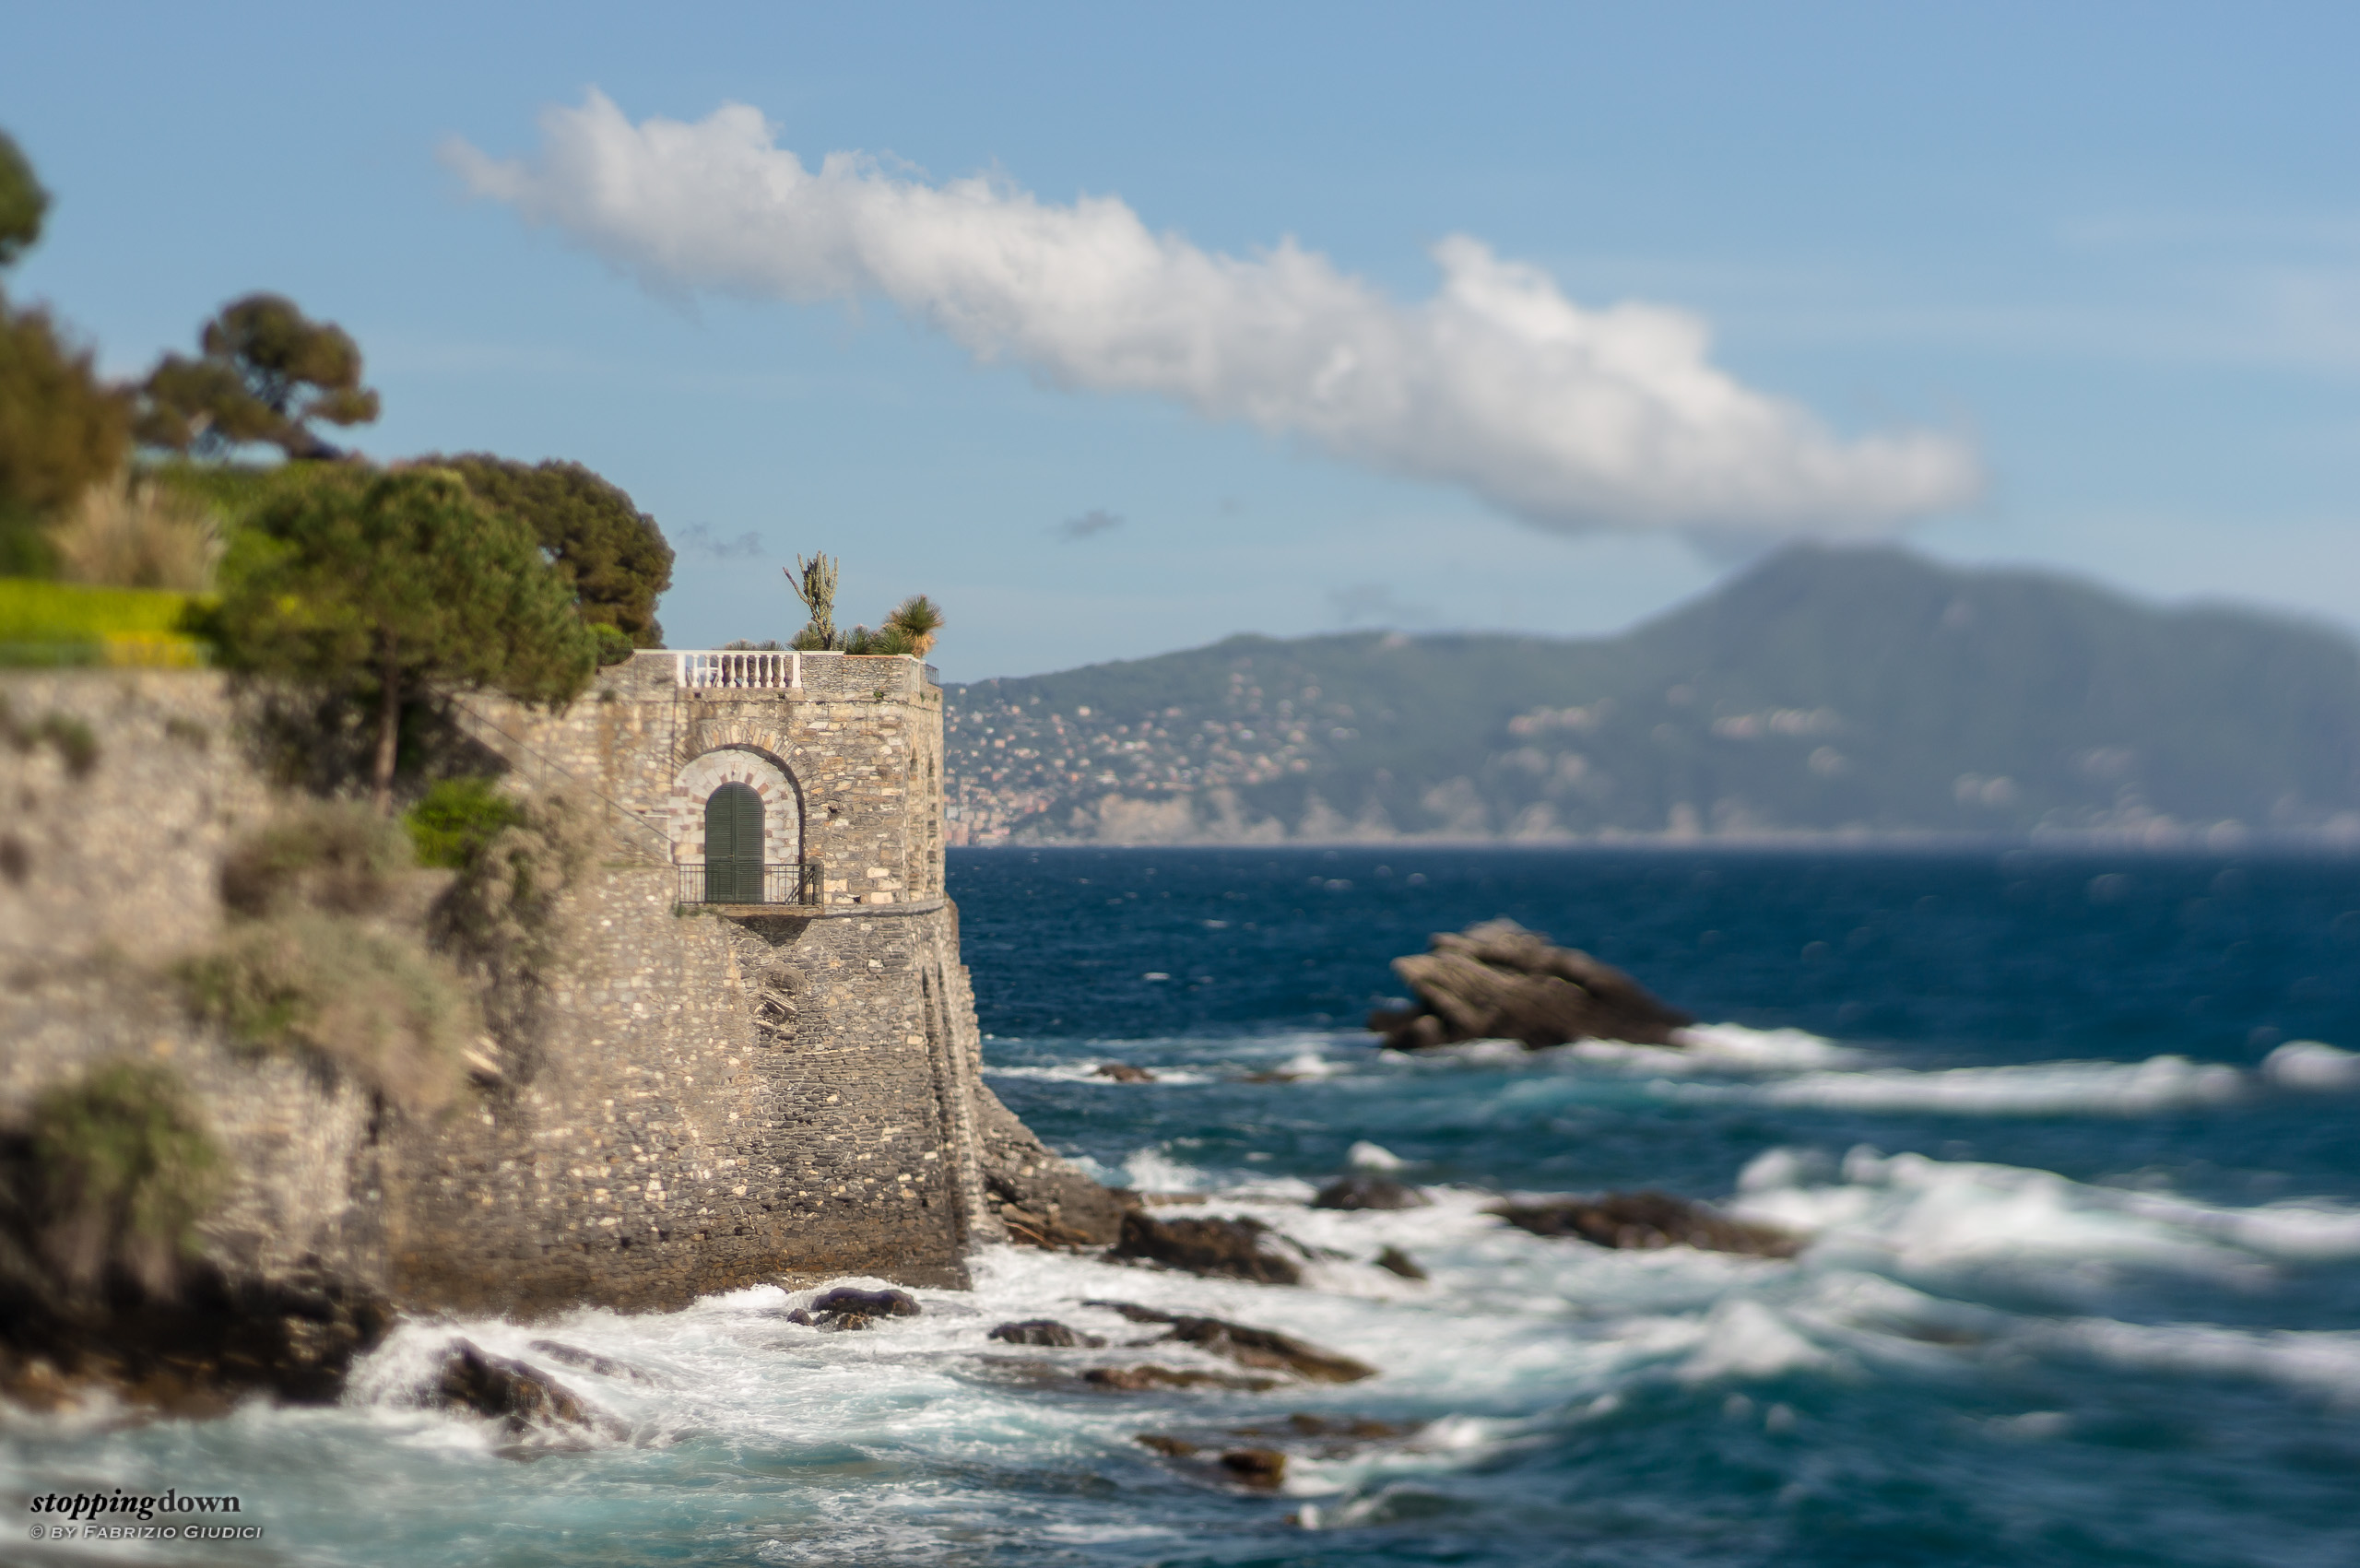
A thing that I've immediately learned is how shallow the focused part is when I use the full aperture (ƒ/1.8) and maximum tilt (8°) — much more than I expected. It can be seen in the photo below, where the lens has been horizontally tilted — it can be confirmed by looking at the horizon line, which appears as a sharp line only for the portion above the black rocks.


Sony NEX-6 + Nikkor 50mm ƒ/1.8D AF @ 50 mm, 1/4000 sec @ ƒ/1.8, +1.00 EV, ISO 100, hand-held, tilt adapter.
Focusing exercise. The only focused part is the vertical column containing the single rock, from near to far distance.
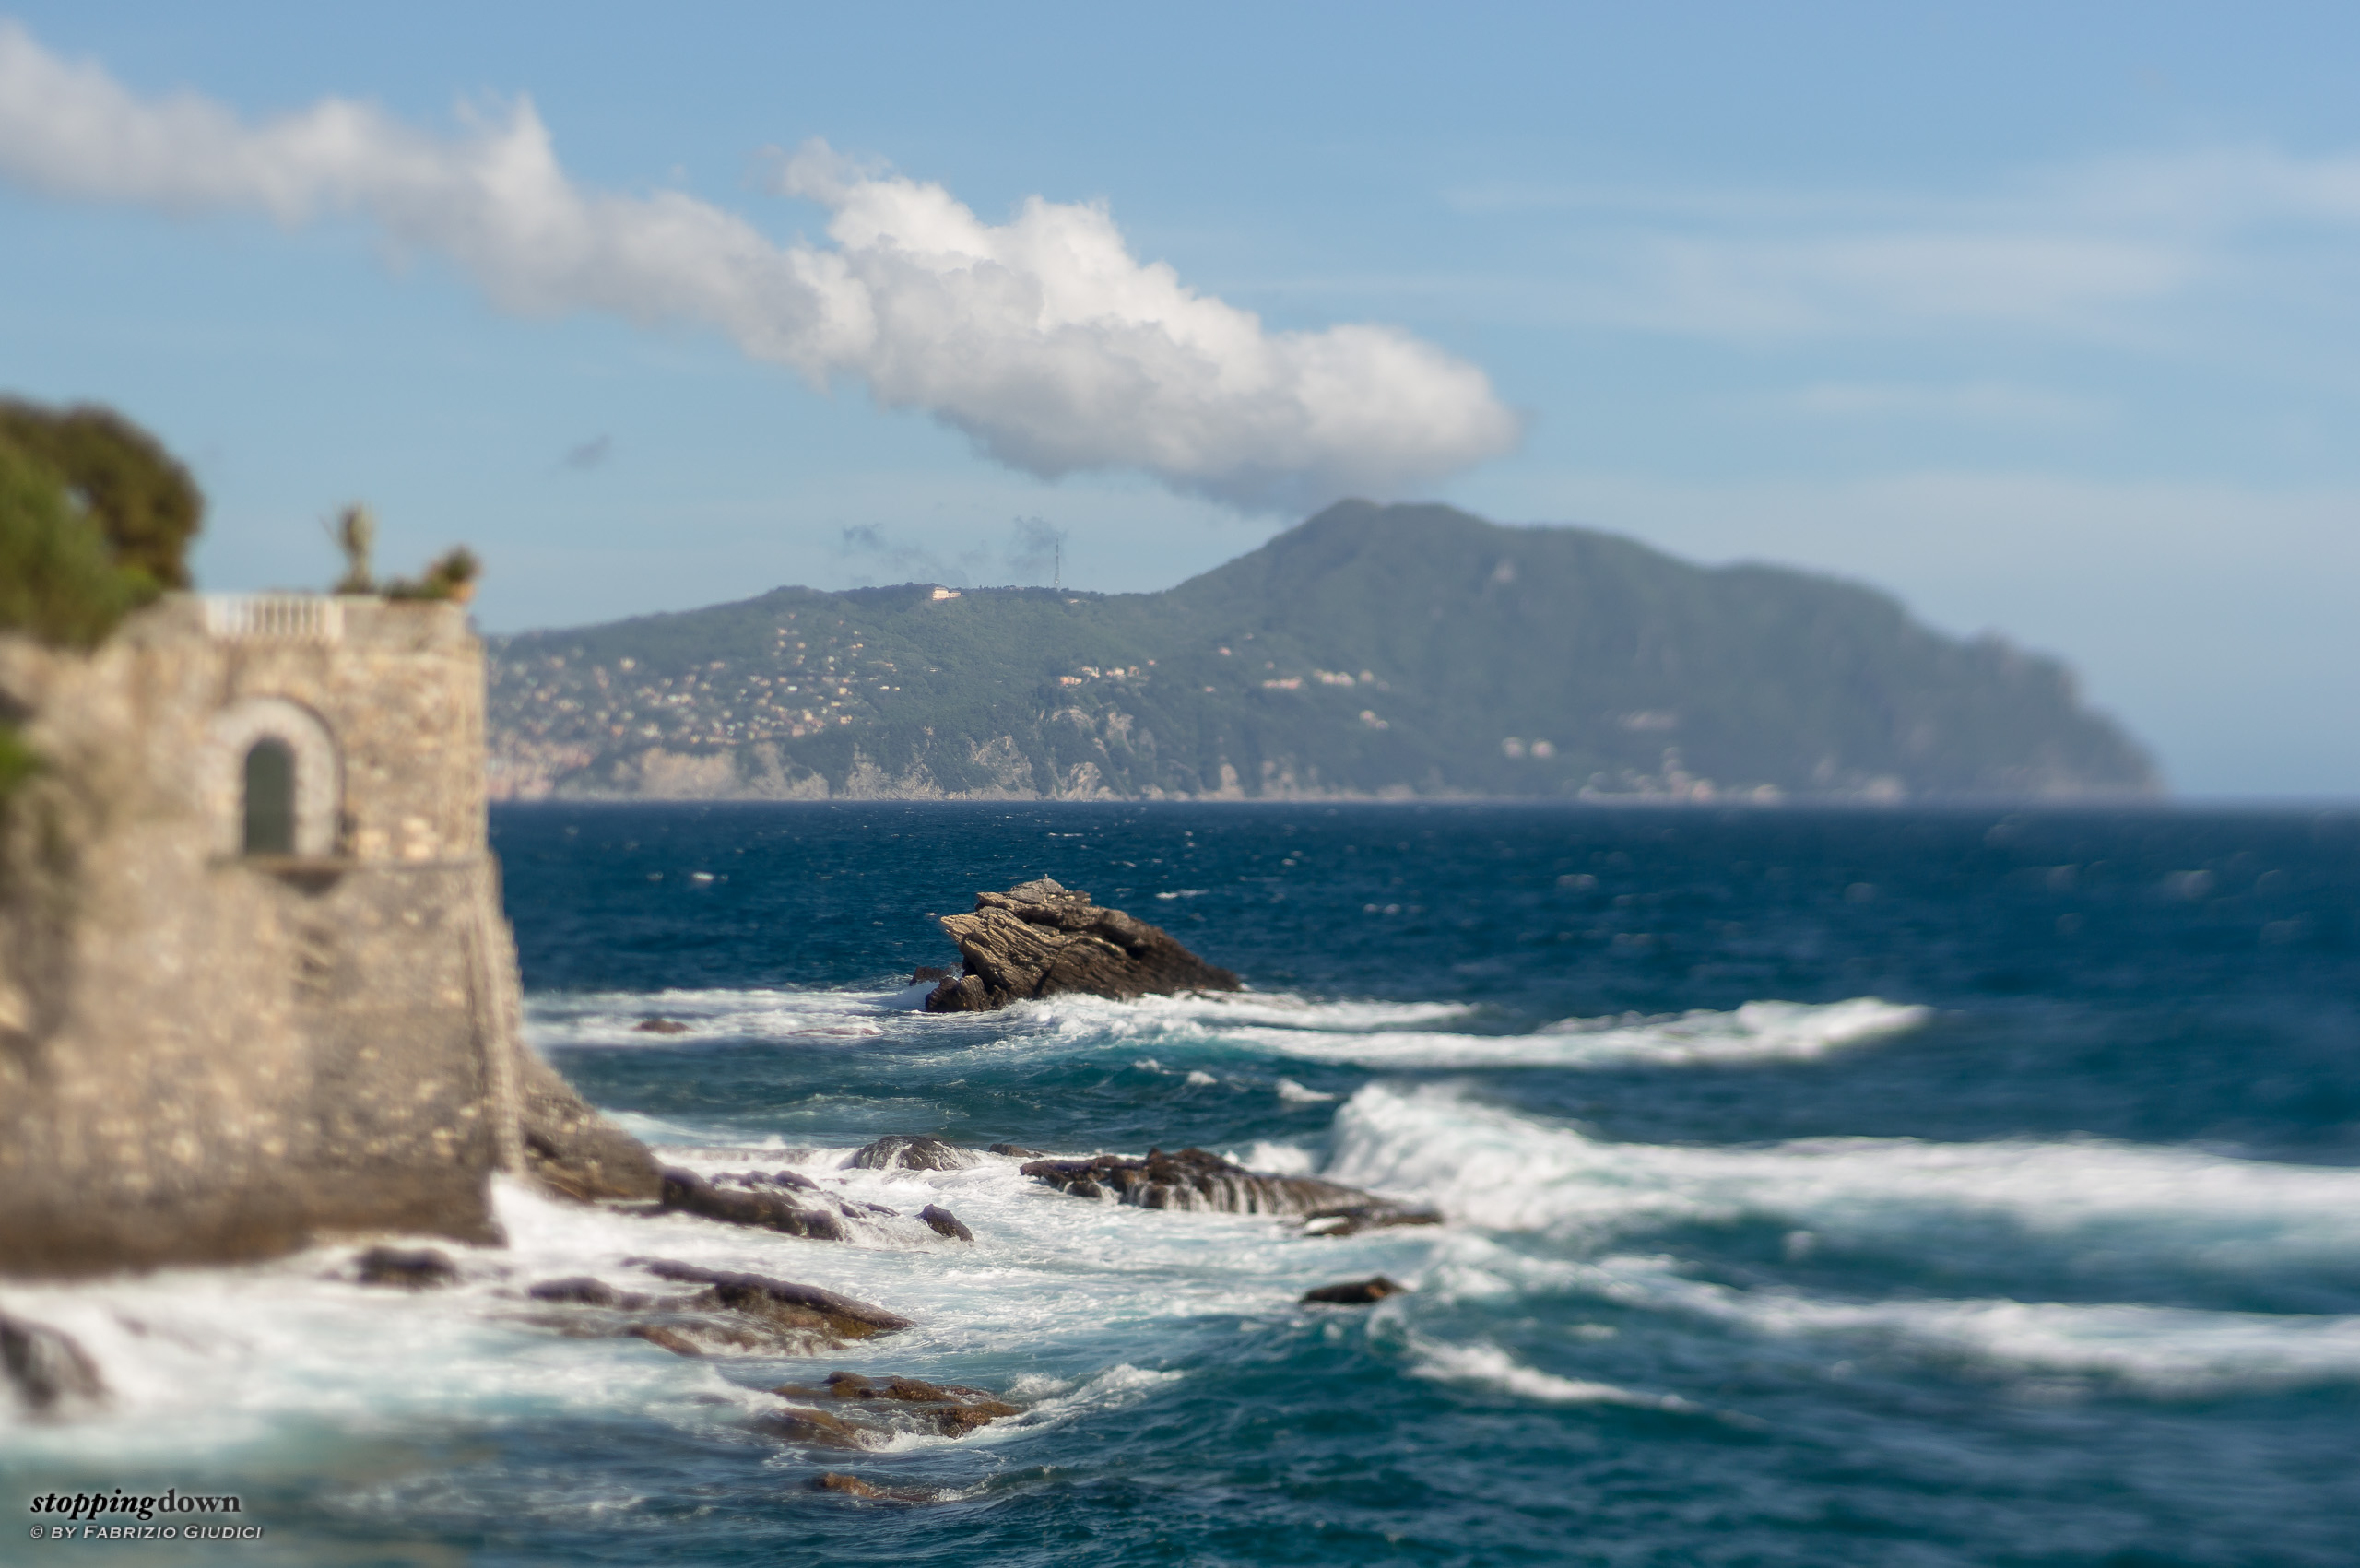
The extreme shallowness of the DoF means that in many cases the lens must be stopped down. The photos below show how four stops change the final effect.

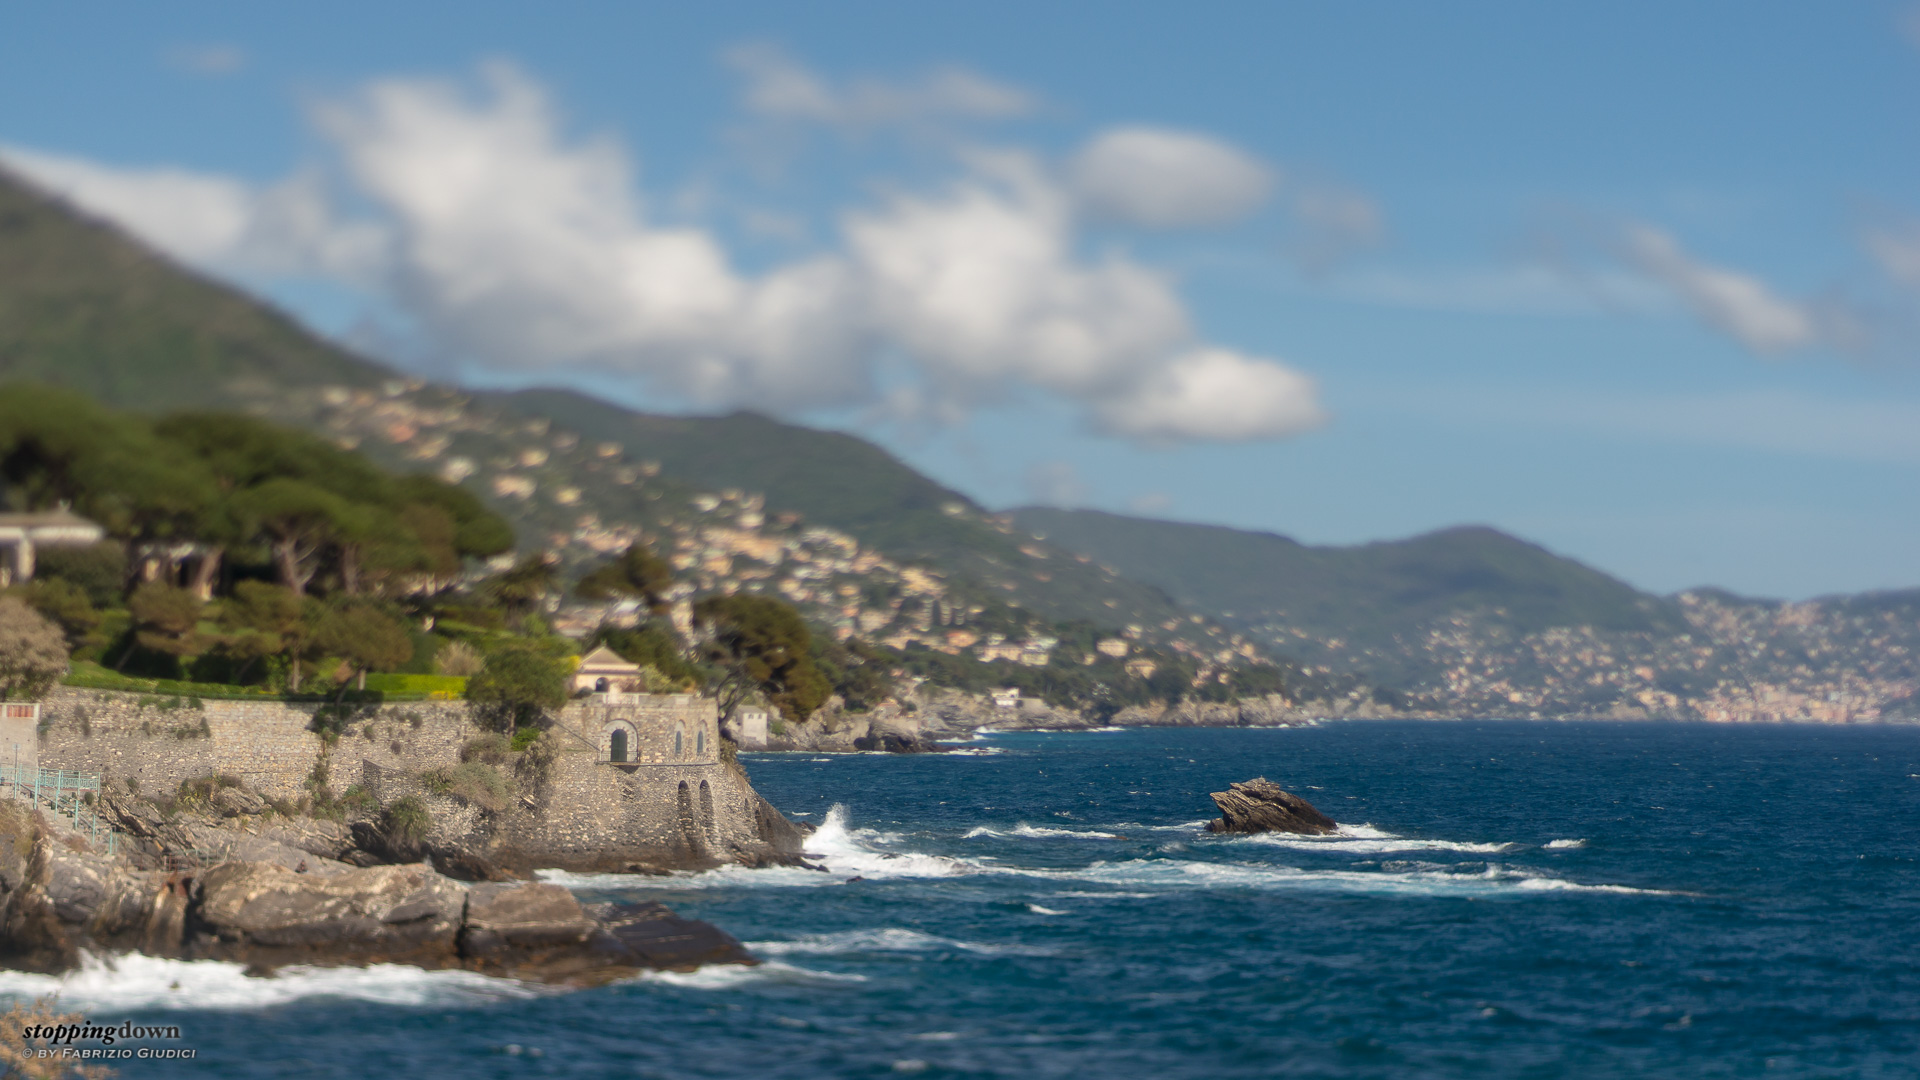
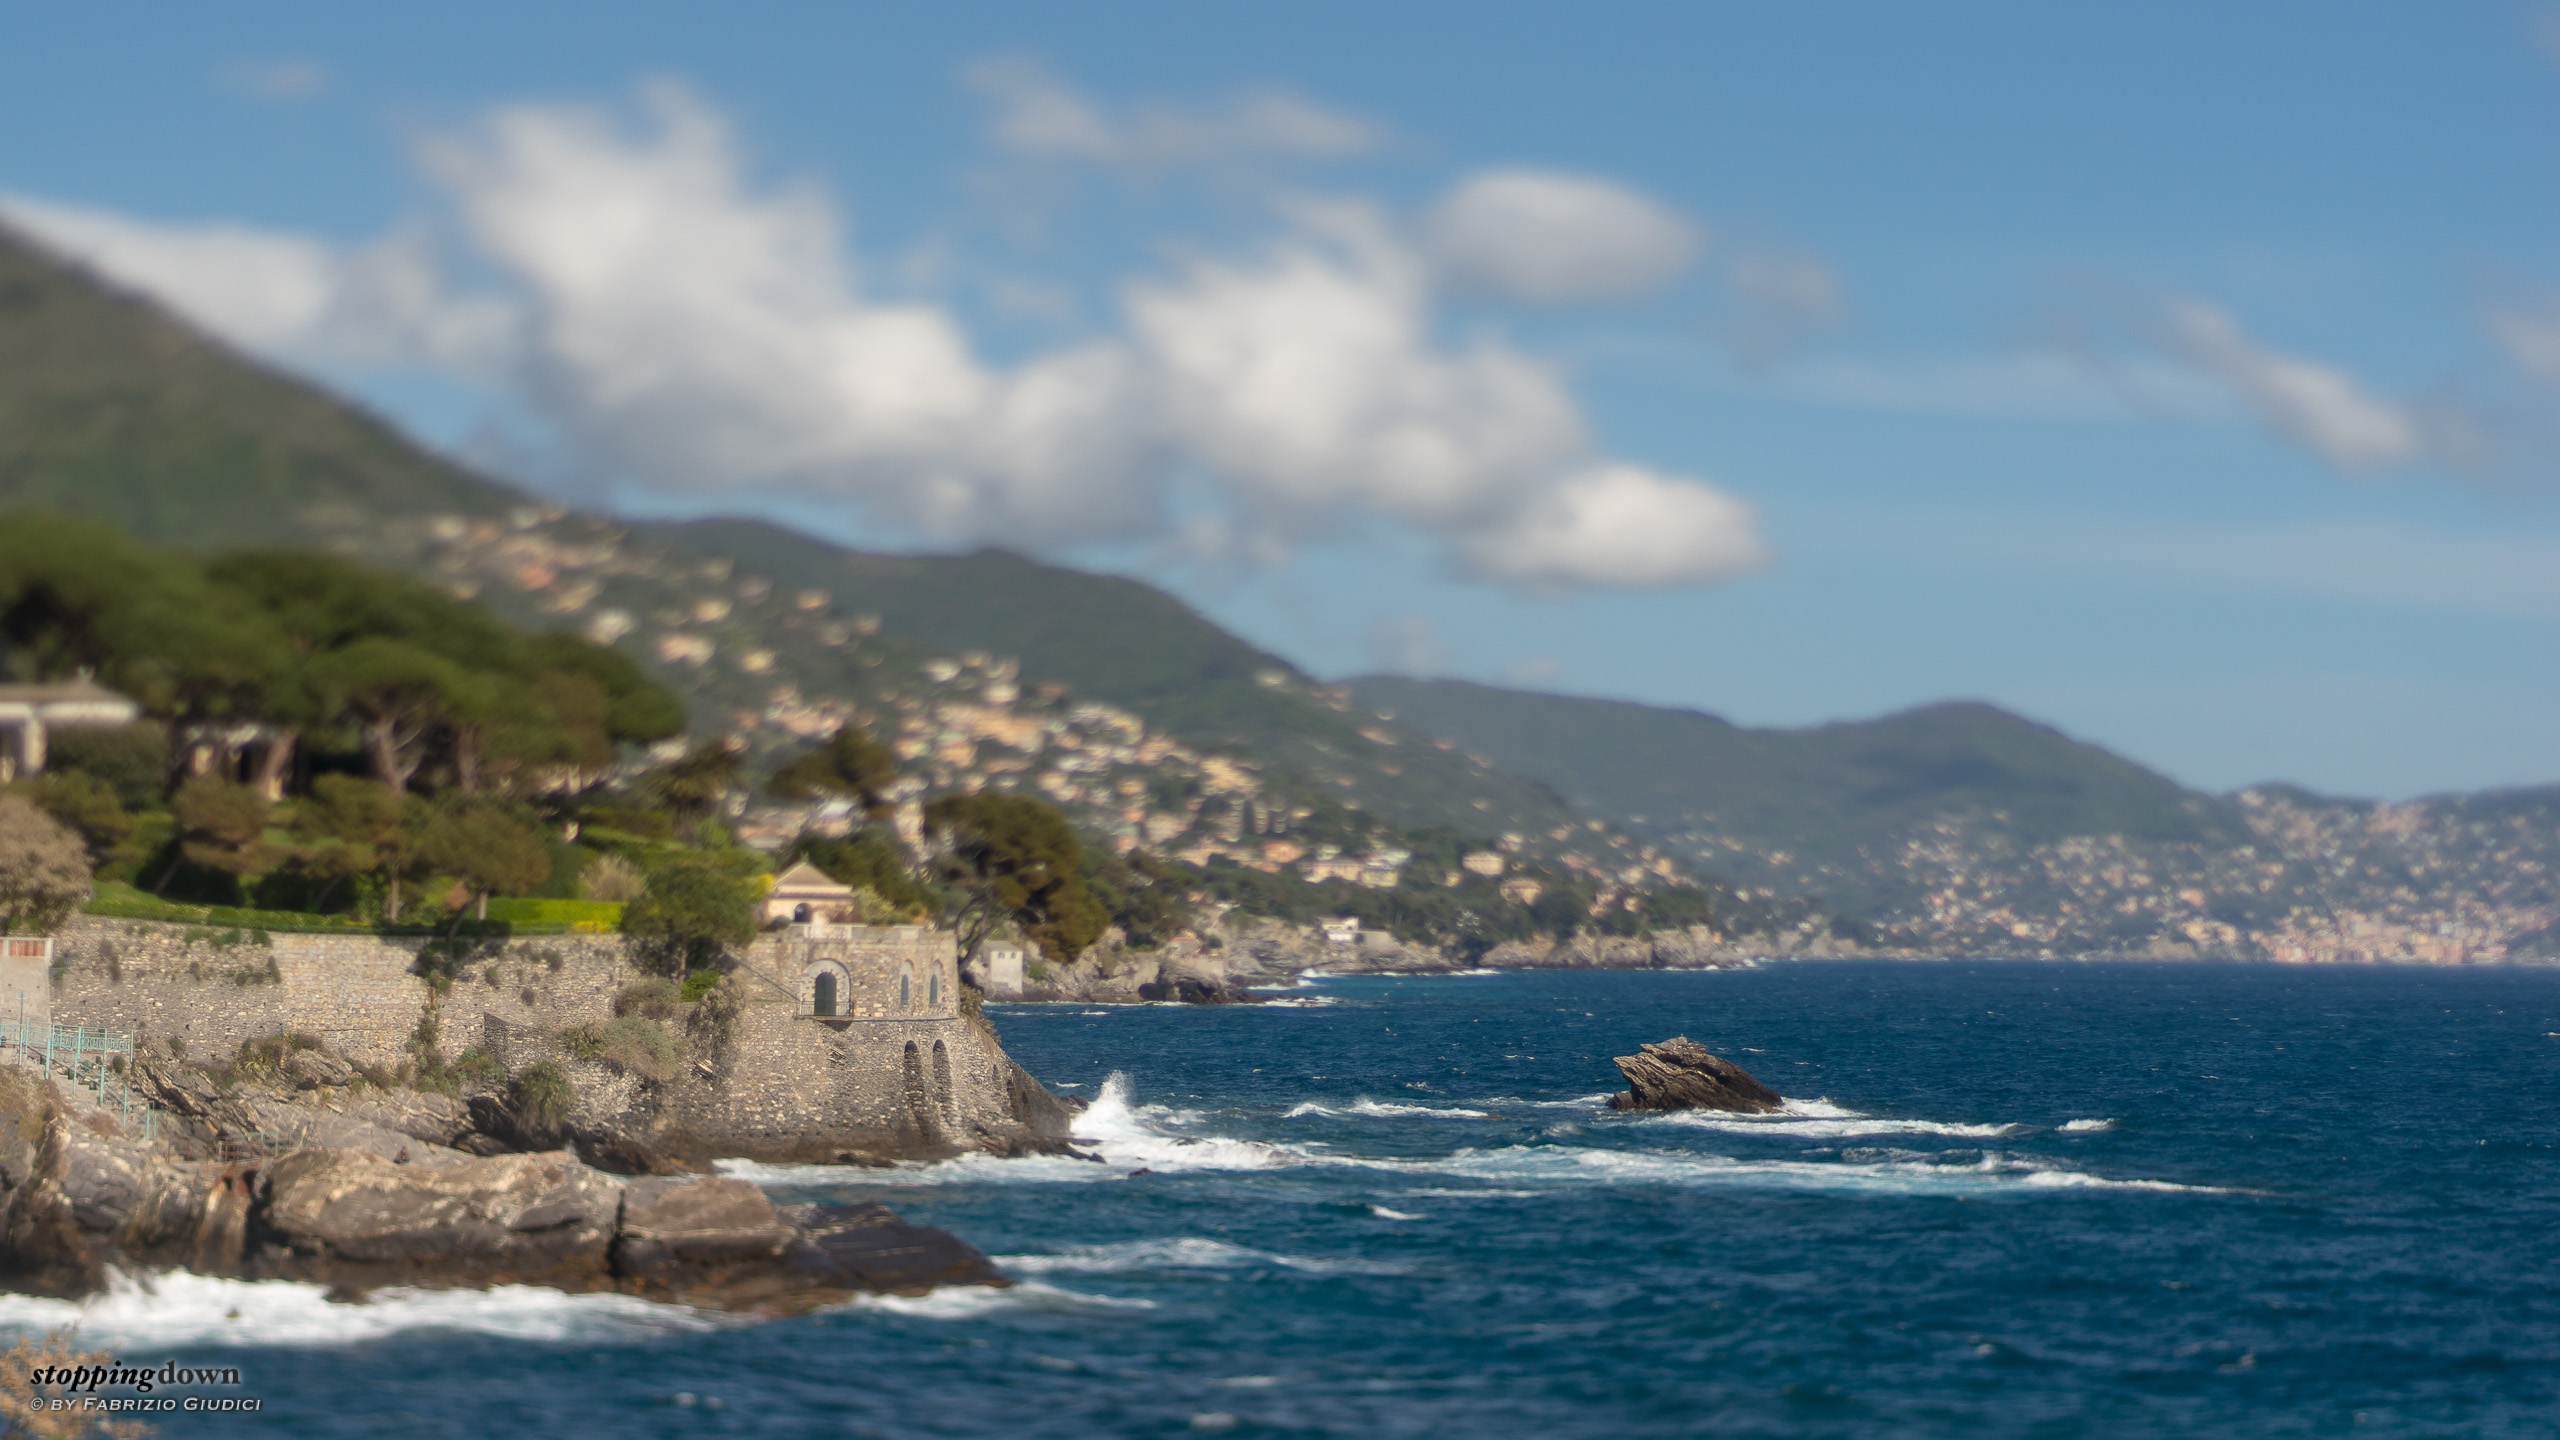
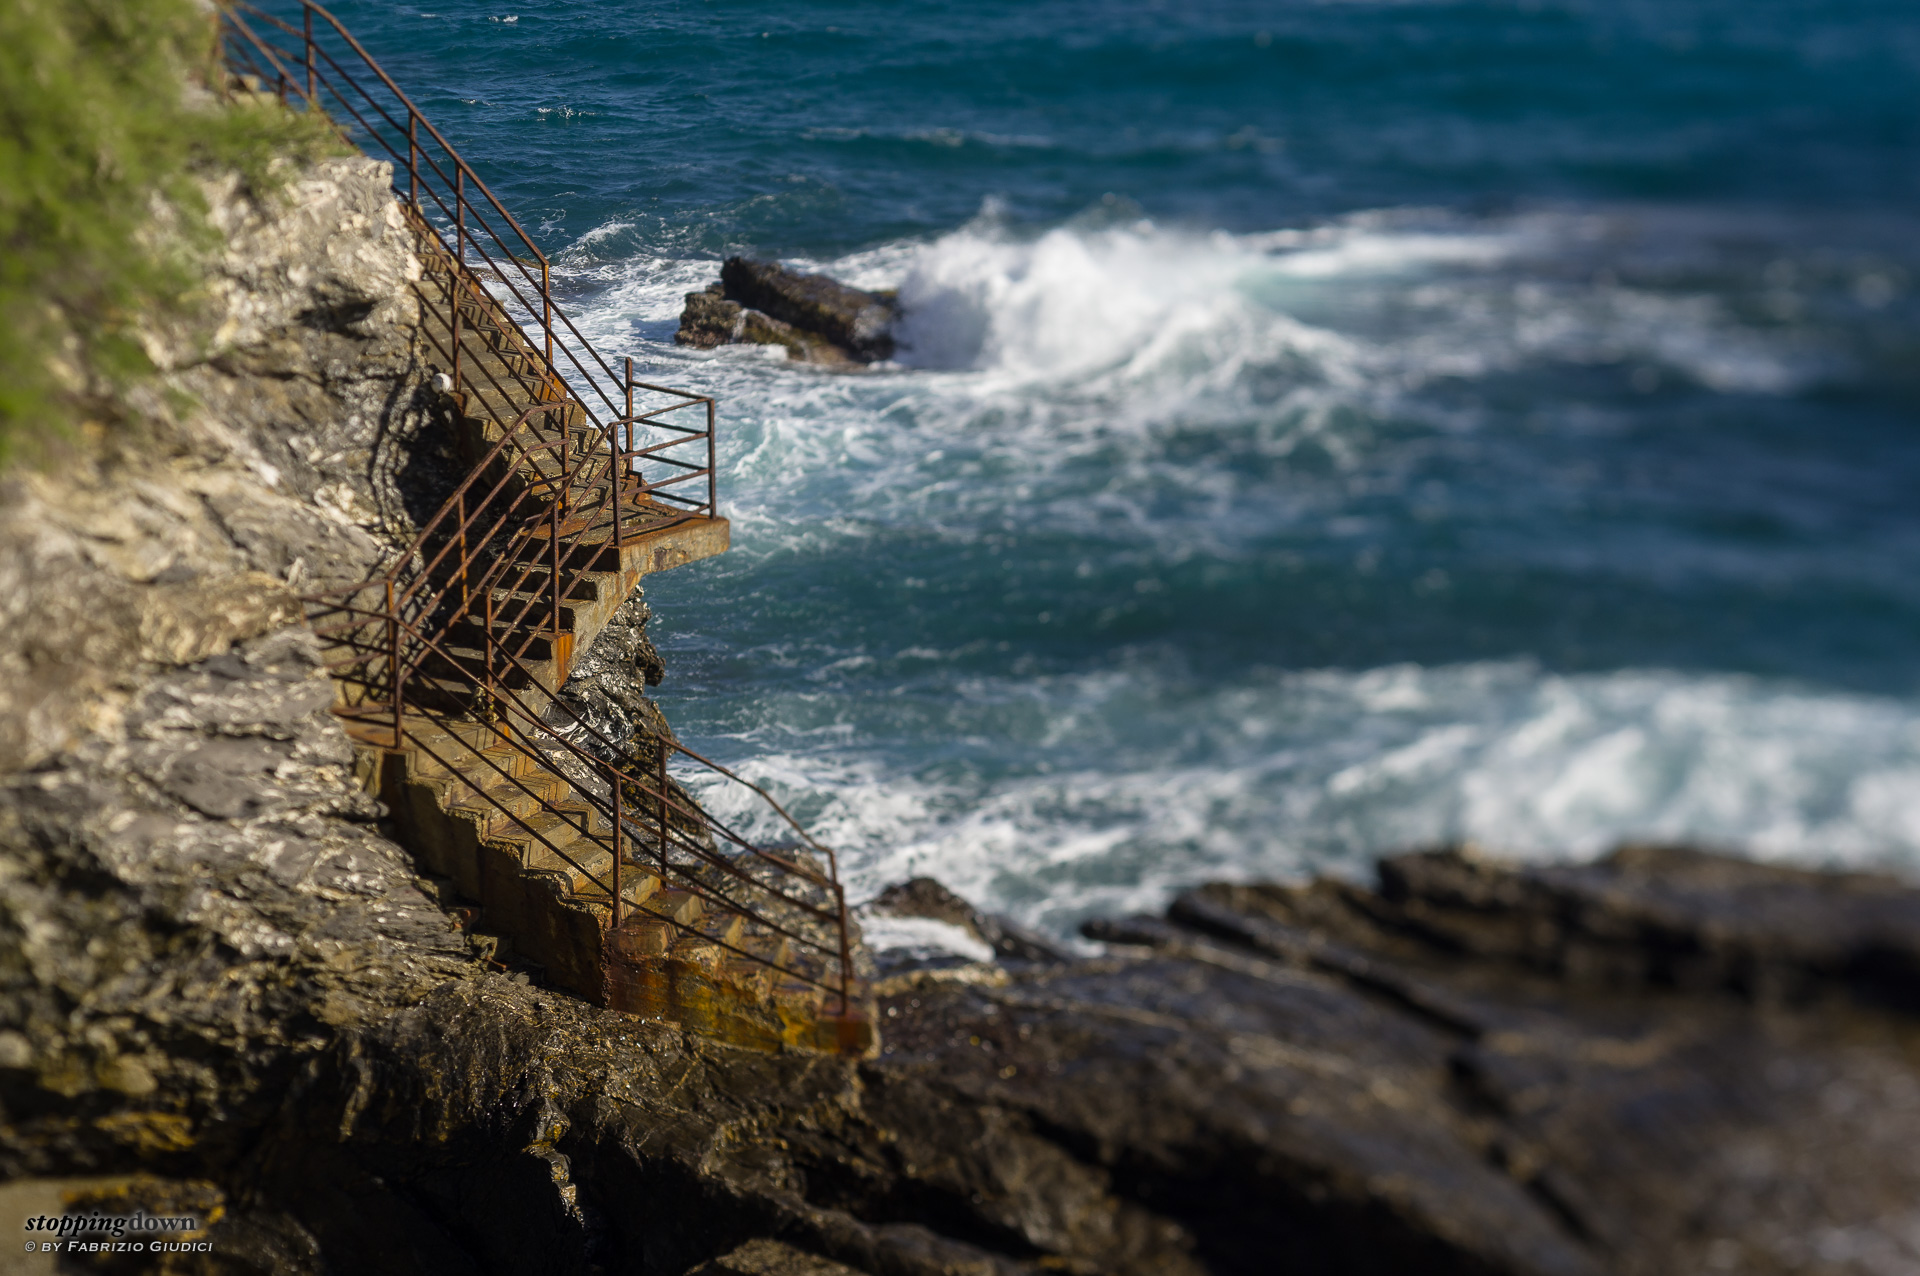
Sony NEX-6 + Nikkor 50mm ƒ/1.8D AF @ 50 mm, 1/4000 sec @ ƒ/1.8, +0.70 EV, ISO 100, hand-held, tilt adapter.
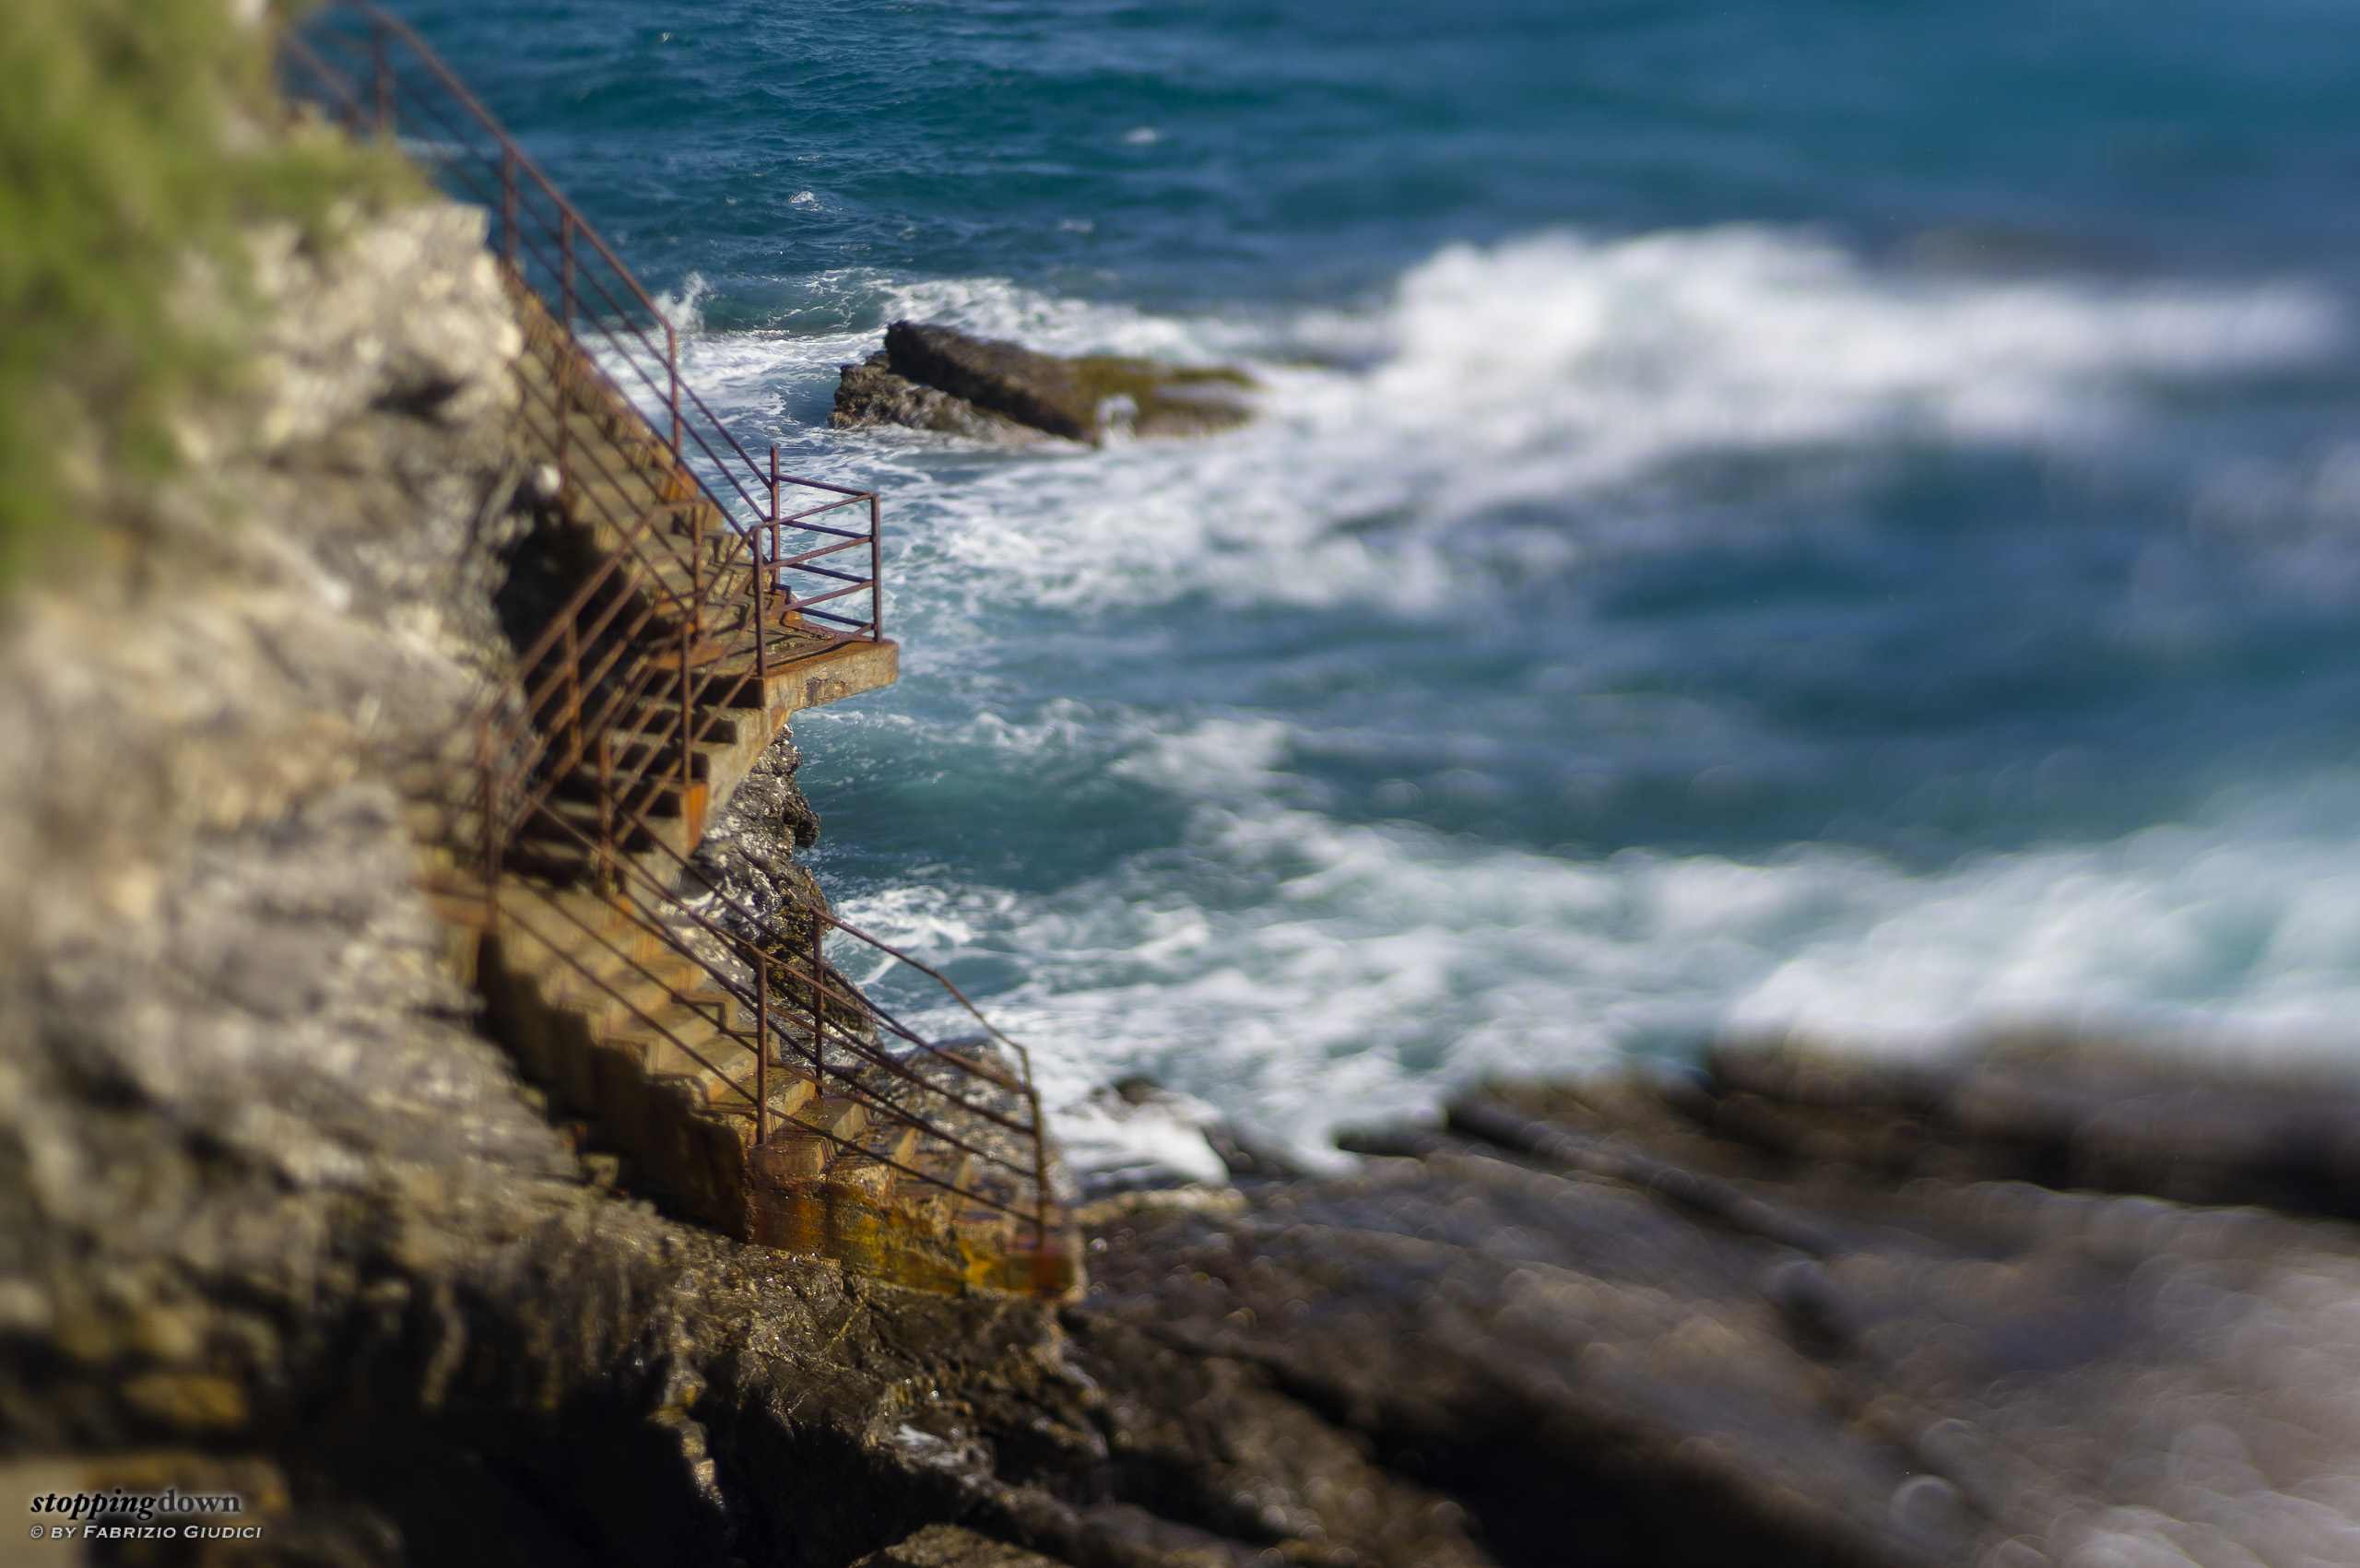
La scala verso il mare.

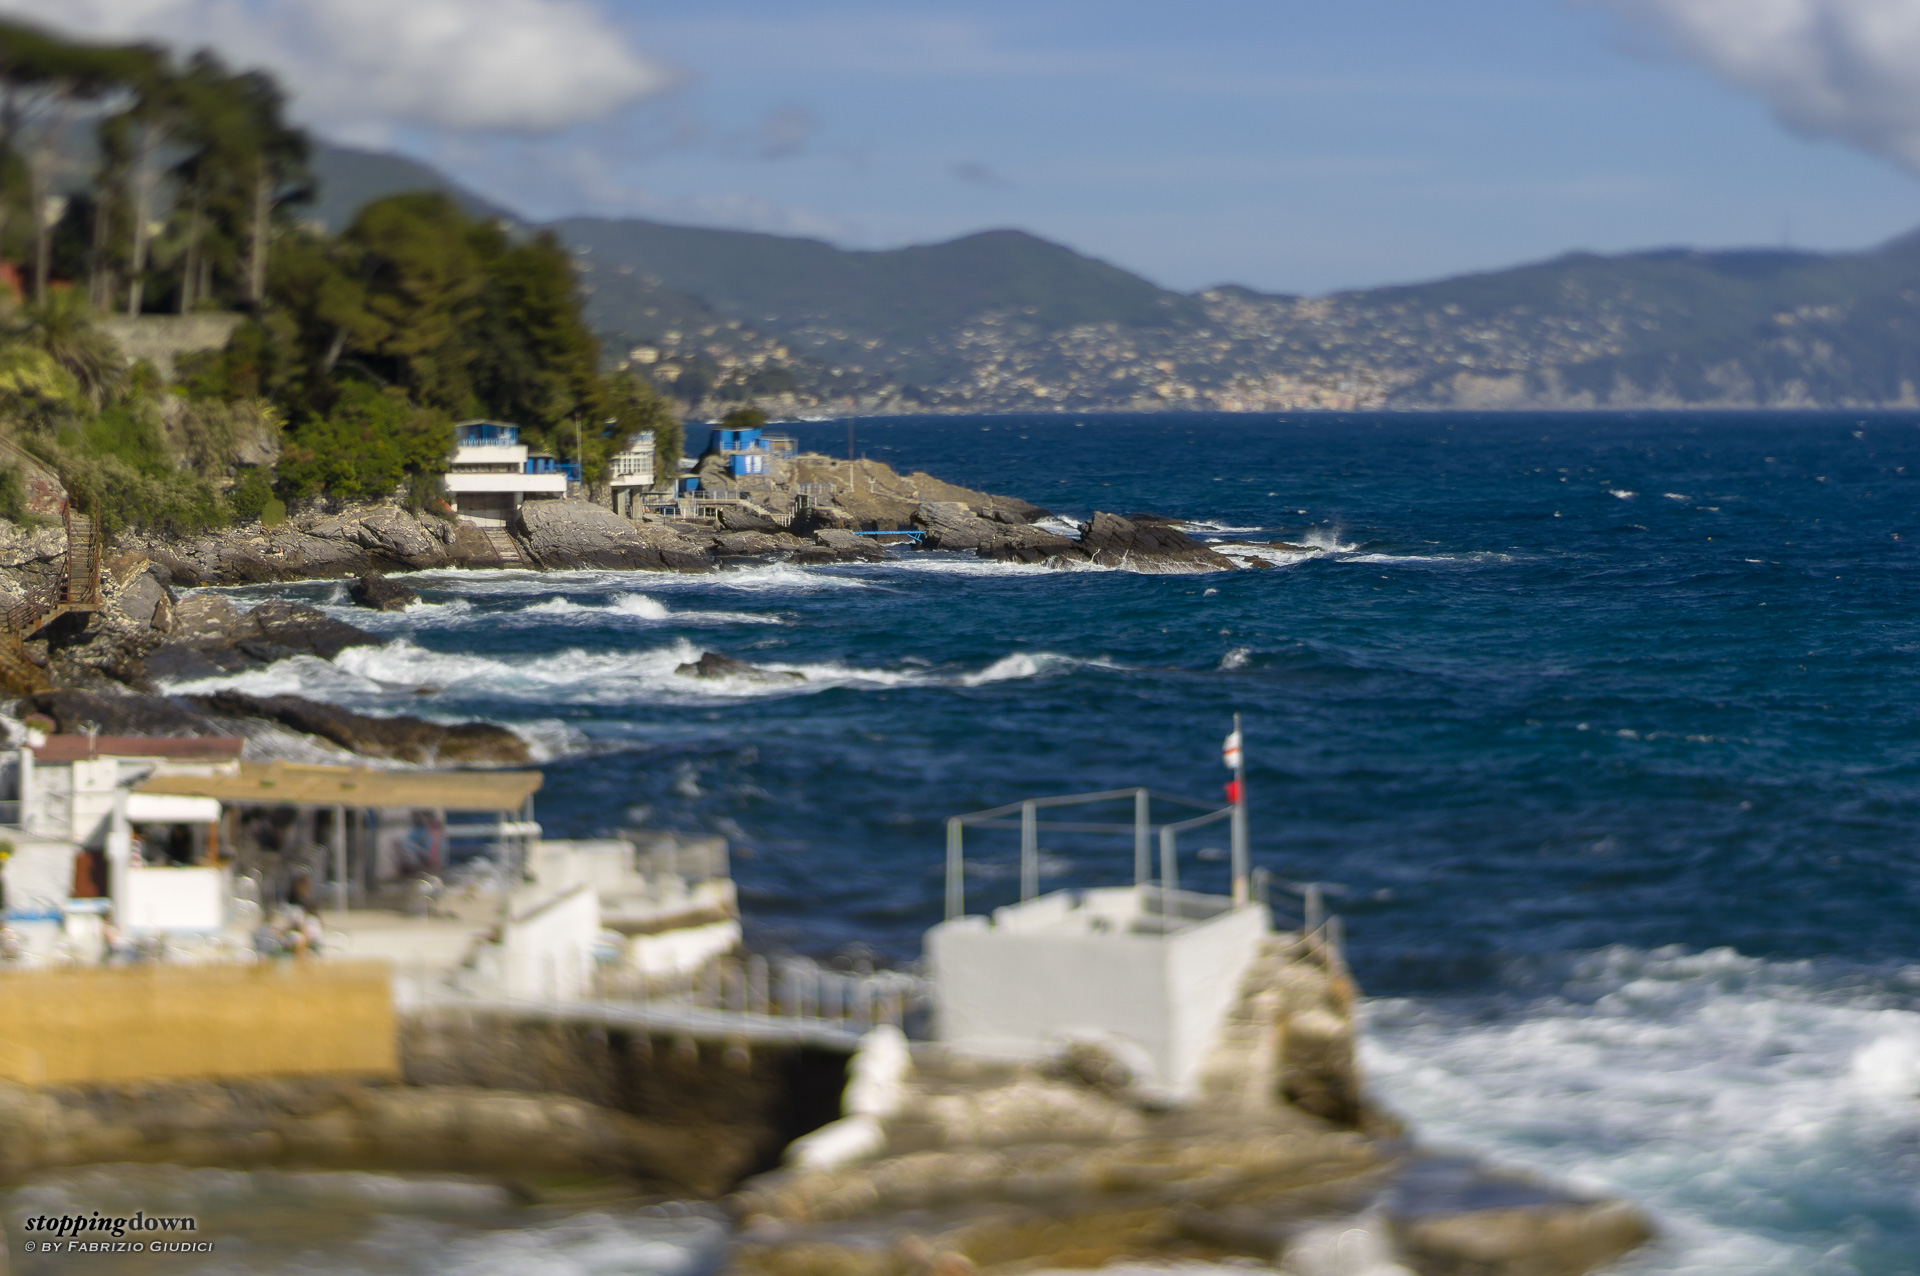
Sony NEX-6 + Nikkor 50mm ƒ/1.8D AF @ 50 mm, 1/640 sec @ ƒ/5.6, +1.00 EV, ISO 100, hand-held, tilt adapter.
La scala verso il mare.
In other scenarios, tilting can be used to increase the blur in the areas that would be already out of focus even without tilt. In the photo below tilting is not needed to blur the background, since the shot has been taken at full aperture and the subject is relatively close; but look how the horizon is more blurred in the right half.


Sony NEX-6 + Nikkor 50mm ƒ/1.8D AF @ 50 mm, 1/800 sec @ ƒ/4, +0.70 EV, ISO 100, hand-held, tilt adapter.
Fiori sulla scogliera.
The subject I'm most interested in for tilt shots are flowers: tilting could be useful to keep a large extension of flowers completely in focus, from near to far distance; or, in case of single flowers, to blur disturbing stuff near the root. But so far the only flower shot with the help of tilting is the blossoming branch of common hawthorn shown below. I used tilting to keep in reasonable focus the single flower at the left and the flower group at the right, staying at full aperture to blur everything else. Being one of the very first shots with the tilting adapter, I mostly got it by trial and error; I think it can be performed in a much better way.